

Camping trips are all about enjoying the great outdoors, but who wants to spend all their time cooking elaborate meals at the campsite? Preparing your food in advance or simple camping meal prep lets you focus on the adventure itself, not on cutting veggies or waiting for rice to cook over a campfire.
Camping meal prep allows you to spend less time cooking while at camp and more time exploring or just relaxing outdoors.
The benefits of make-ahead meals extend beyond just saving time. They help you cut down on the amount of cooking gear you need to bring along and reduce food waste.
To maximize convenience, plan your meals based on the number of days you'll be camping and your food storage options. If you’ve got access to a cooler, you can bring perishable items like meats and dairy. No cooler? Stick to non-perishables like canned beans, pasta, and grains.
Affiliate Disclaimer: This site contains affiliate links, which means I may earn a commission on purchases made through these links at no extra cost to you.
Table of Contents
Breakfast Camping Recipes

Start your day of adventure right with these delicious and easy make-ahead breakfast options!
1. Overnight Oats with Fresh Berries and Nuts
Serves 4
Ingredients:
- 2 cups rolled oats
- 2 cups milk (dairy or plant-based)
- 2 tbsp honey or maple syrup
- 1 tsp vanilla extract
- 1/4 tsp salt
- 1 cup mixed berries
- 1/2 cup chopped nuts (almonds, walnuts, or pecans)
Instructions:
- In a large bowl, mix oats, milk, honey, vanilla, and salt.
- Divide mixture into 4 airtight containers.
- Refrigerate overnight or up to 5 days.
- Before serving, top with fresh berries and chopped nuts.
2. Breakfast Burritos with Scrambled Eggs and Veggies
Makes 6 burritos
Ingredients:
- 12 large eggs
- 1/4 cup milk
- 1 tbsp olive oil
- 1 bell pepper, diced
- 1 onion, diced
- 1 cup spinach, chopped
- 1 cup shredded cheddar cheese
- 6 large tortillas
- Salt and pepper to taste
Instructions:
- Whisk eggs and milk in a bowl.
- In a large skillet, sauté peppers and onions in olive oil until soft.
- Add spinach and cook until wilted.
- Pour in egg mixture and scramble until set.
- Season with salt and pepper.
- Let cool, then divide mixture among tortillas.
- Add cheese and roll up burritos.
- Wrap in foil and refrigerate or freeze.
- To reheat: warm in a skillet over the campfire or on a portable stove.
3. Banana Bread Pancakes with Maple Syrup
Makes 12 pancakes
Ingredients:
- 2 cups all-purpose flour
- 2 tsp baking powder
- 1/2 tsp baking soda
- 1/2 tsp cinnamon
- 1/4 tsp salt
- 2 ripe bananas, mashed
- 2 eggs
- 1 1/2 cups milk
- 2 tbsp melted butter
- 1 tsp vanilla extract
- Maple syrup for serving
Instructions:
- Mix dry ingredients in a large bowl.
- In another bowl, whisk mashed bananas, eggs, milk, butter, and vanilla.
- Combine wet and dry ingredients until just mixed.
- Cook pancakes on a griddle or skillet.
- Let cool, then stack with parchment paper between each pancake.
- Store in an airtight container or zip-top bag.
- Reheat on a skillet or wrapped in foil near the campfire. Serve with maple syrup.
4. Spinach and Feta Frittata Muffins
Makes 12 muffins
Ingredients:
- 10 large eggs
- 1/4 cup milk
- 2 cups fresh spinach, chopped
- 1 cup crumbled feta cheese
- 1/2 cup diced red bell pepper
- 1/4 cup chopped fresh herbs (dill, parsley, or basil)
- Salt and pepper to taste
Instructions:
- Preheat oven to 375°F (190°C).
- Whisk eggs and milk in a large bowl.
- Stir in spinach, feta, bell pepper, herbs, salt, and pepper.
- Grease a 12-cup muffin tin and divide mixture evenly.
- Bake for 20-25 minutes until set and golden.
- Cool completely before storing in an airtight container.
- Reheat gently over the campfire or enjoy cold.
5. Chia Seed Pudding with Coconut Milk and Tropical Fruits
Serves 4
Ingredients:
- 1/2 cup chia seeds
- 2 cups coconut milk
- 2 tbsp honey or agave syrup
- 1 tsp vanilla extract
- 1 cup mixed tropical fruits (mango, pineapple, kiwi), diced
- 1/4 cup toasted coconut flakes
Instructions:
- In a large bowl, whisk chia seeds, coconut milk, honey, and vanilla.
- Divide mixture into 4 jars or containers.
- Refrigerate overnight or for at least 4 hours.
- Before serving, top with diced tropical fruits and coconut flakes.
Pro Tip: For all these recipes, keep ingredients cold in a well-insulated cooler until ready to enjoy at your campsite. Always practice food safety by consuming perishable items within a safe timeframe and maintaining proper storage temperatures.
Lunch Recipes
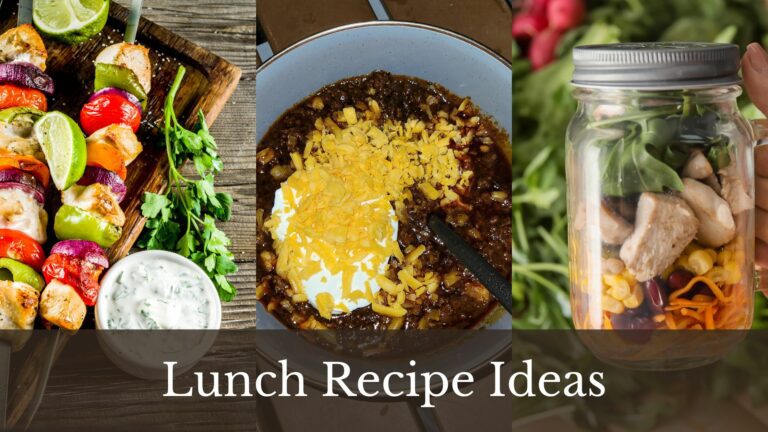
Fuel your afternoon adventures with these delicious and portable lunch options!
1. Mason Jar Salads with Grilled Chicken and Quinoa
Makes 4 servings
Ingredients:
- 2 cups cooked quinoa, cooled
- 2 grilled chicken breasts, diced
- 2 cups cherry tomatoes, halved
- 1 cucumber, diced
- 1 cup feta cheese, crumbled
- 1 cup mixed greens
- 1/4 cup olive oil
- 2 tbsp lemon juice
- 1 tsp dried oregano
- Salt and pepper to taste
Instructions:
- In a small bowl, whisk together olive oil, lemon juice, oregano, salt, and pepper to make the dressing.
- In 4 mason jars, layer ingredients in this order: 2 tbsp dressing, 1/2 cup quinoa, 1/2 grilled chicken breast, 1/2 cup tomatoes, 1/4 cucumber, 1/4 cup feta, 1/4 cup mixed greens.
- Seal jars and refrigerate for up to 3 days.
- To serve, shake the jar to distribute the dressing and enjoy directly from the jar or pour into a bowl.
2. Mediterranean Wraps with Hummus and Falafel
Makes 4 wraps
Ingredients:
- 4 large tortillas or flatbreads
- 1 cup store-bought or homemade hummus
- 8 pre-made falafel balls, halved
- 1 cucumber, sliced
- 1 cup cherry tomatoes, halved
- 1/2 red onion, thinly sliced
- 1/2 cup Kalamata olives, pitted and halved
- 1 cup mixed salad greens
- 1/4 cup tzatziki sauce
Instructions:
- Spread 1/4 cup hummus on each tortilla.
- Layer each wrap with 4 falafel halves, cucumber slices, tomatoes, red onion, olives, and mixed greens.
- Drizzle with tzatziki sauce.
- Roll up tightly and wrap in foil.
- Refrigerate for up to 2 days.
- Enjoy cold or at room temperature.
3. Cold Soba Noodle Salad with Sesame Dressing
Serves 4
Ingredients:
- 8 oz soba noodles
- 1 red bell pepper, thinly sliced
- 2 carrots, julienned
- 1 cucumber, julienned
- 1/4 cup chopped cilantro
- 2 tbsp sesame seeds
- 1/4 cup rice vinegar
- 3 tbsp soy sauce
- 2 tbsp sesame oil
- 1 tbsp honey
- 1 tsp grated ginger
Instructions:
- Cook soba noodles according to package instructions. Rinse with cold water and drain.
- In a small bowl, whisk together rice vinegar, soy sauce, sesame oil, honey, and ginger to make the dressing.
- In a large bowl, combine noodles, bell pepper, carrots, cucumber, and cilantro.
- Pour dressing over the salad and toss to combine.
- Sprinkle with sesame seeds.
- Store in an airtight container and refrigerate for up to 3 days.
- Serve chilled or at room temperature.
4. Antipasto Skewers with Marinated Vegetables and Cheese
Makes 12 skewers
Ingredients:
- 12 small mozzarella balls
- 12 cherry tomatoes
- 12 artichoke hearts, halved
- 12 pitted olives (mix of green and black)
- 12 slices of salami, folded
- 1 zucchini, sliced and grilled
- 1/4 cup olive oil
- 2 tbsp balsamic vinegar
- 1 tsp dried Italian herbs
- Salt and pepper to taste
- 12 bamboo skewers
Instructions:
- In a small bowl, whisk together olive oil, balsamic vinegar, Italian herbs, salt, and pepper.
- Thread ingredients onto skewers in this order: mozzarella, tomato, artichoke heart, olive, salami, zucchini.
- Place skewers in a shallow dish and drizzle with the marinade.
- Cover and refrigerate for at least 2 hours or up to 24 hours.
- Transport in an airtight container with the marinade.
- Serve chilled or at room temperature.
5. Hearty Vegetable and Bean Chili
Serves 6
Ingredients:
- 2 cans (15 oz each) kidney beans, drained and rinsed
- 1 can (15 oz) black beans, drained and rinsed
- 1 can (14.5 oz) diced tomatoes
- 1 can (15 oz) corn, drained
- 1 onion, diced
- 2 bell peppers, diced
- 2 cloves garlic, minced
- 2 tbsp olive oil
- 2 tbsp chili powder
- 1 tsp cumin
- 1 tsp oregano
- Salt and pepper to taste
- Optional toppings: shredded cheese, sour cream, chopped cilantro
Instructions:
- In a large pot, heat olive oil over medium heat. Sauté onions, bell peppers, and garlic until softened.
- Add chili powder, cumin, and oregano. Cook for 1 minute until fragrant.
- Add beans, tomatoes, and corn. Simmer for 20-30 minutes.
- Season with salt and pepper to taste.
- Allow to cool completely before transferring to an airtight container.
- Refrigerate for up to 3 days or freeze for longer storage.
- To serve at the campsite, reheat in a pot over the campfire or on a camping stove.
- Serve with optional toppings.
Pro Tip: For easy transport and serving, pack the chili in individual portions using heat-safe containers. This way, you can reheat only what you need for each meal.
Dinner Recipes

End your day relaxing around the campsite with these hearty and delicious dinner options!
1. Foil Packet Garlic Butter Shrimp and Vegetables
Serves 4
Ingredients:
- 1 lb large shrimp, peeled and deveined
- 2 zucchini, sliced
- 1 red bell pepper, sliced
- 1 yellow bell pepper, sliced
- 1 red onion, sliced
- 4 tbsp butter, softened
- 4 cloves garlic, minced
- 1 tsp dried oregano
- 1 tsp dried thyme
- Salt and pepper to taste
- 1 lemon, sliced
- Chopped parsley for garnish
Instructions:
- In a small bowl, mix softened butter with minced garlic, oregano, thyme, salt, and pepper.
- Tear off 4 large pieces of heavy-duty aluminum foil.
- Divide vegetables equally among the foil pieces.
- Top each vegetable portion with 1/4 of the shrimp.
- Spread 1 tbsp of the garlic butter mixture over each shrimp and vegetable portion.
- Top each packet with a lemon slice.
- Fold the foil to create sealed packets.
- Store in a cooler until ready to cook.
- To cook, place packets on a grill grate over the campfire for 10-12 minutes, or until shrimp is pink and vegetables are tender.
- Carefully open packets and garnish with chopped parsley before serving.
2. Campfire-Ready Beef and Vegetable Stew
Serves 6
Ingredients:
- 2 lbs beef stew meat, cut into 1-inch cubes
- 1/4 cup all-purpose flour
- 2 tbsp vegetable oil
- 1 onion, diced
- 3 carrots, sliced
- 2 celery stalks, sliced
- 2 potatoes, peeled and cubed
- 1 can (14.5 oz) diced tomatoes
- 4 cups beef broth
- 2 bay leaves
- 1 tsp dried thyme
- Salt and pepper to taste
Instructions:
- At home, toss beef cubes with flour, salt, and pepper.
- In a large pot, heat oil and brown the beef in batches. Remove and set aside.
- In the same pot, sauté onions, carrots, and celery until softened.
- Return beef to the pot and add potatoes, tomatoes, beef broth, bay leaves, and thyme.
- Bring to a boil, then simmer for 1.5-2 hours until beef is tender.
- Allow to cool completely, then transfer to airtight containers.
- Refrigerate or freeze until ready to use.
- At the campsite, reheat in a pot over the campfire, stirring occasionally until hot.
3. Pesto Pasta Salad with Sun-Dried Tomatoes and Pine Nuts
Serves 6
Ingredients:
- 1 lb rotini pasta
- 1 cup prepared pesto
- 1/2 cup sun-dried tomatoes, chopped
- 1/4 cup pine nuts, toasted
- 1/2 cup grated Parmesan cheese
- 1/4 cup olive oil
- 2 tbsp lemon juice
- Salt and pepper to taste
- Fresh basil leaves for garnish
Instructions:
- Cook pasta according to package instructions. Drain and rinse with cold water.
- In a large bowl, mix pesto, olive oil, and lemon juice.
- Add cooled pasta to the bowl and toss to coat with the pesto mixture.
- Stir in sun-dried tomatoes, pine nuts, and Parmesan cheese.
- Season with salt and pepper to taste.
- Store in an airtight container and refrigerate until ready to serve.
- Before serving, let it come to room temperature and garnish with fresh basil leaves.
4. BBQ Pulled Pork Sandwiches with Coleslaw
Serves 8
Ingredients: For the pulled pork:
- 3 lbs pork shoulder
- 2 tbsp brown sugar
- 2 tsp paprika
- 1 tsp garlic powder
- 1 tsp onion powder
- 1 tsp salt
- 1/2 tsp black pepper
- 1 cup BBQ sauce
For the coleslaw:
- 4 cups shredded cabbage
- 1 carrot, grated
- 1/4 cup mayonnaise
- 1 tbsp apple cider vinegar
- 1 tsp sugar
- Salt and pepper to taste
8 hamburger buns
Instructions:
- At home, mix brown sugar, paprika, garlic powder, onion powder, salt, and pepper. Rub this mixture all over the pork shoulder.
- Cook the pork in a slow cooker on low for 8-10 hours or until tender.
- Shred the pork and mix with BBQ sauce. Allow to cool completely.
- For the coleslaw, mix cabbage and carrot in a bowl. In another bowl, whisk mayonnaise, vinegar, sugar, salt, and pepper. Combine with the vegetables.
- Store pulled pork and coleslaw separately in airtight containers.
- At the campsite, reheat the pulled pork in a pot over the campfire or on a camping stove.
- Serve on hamburger buns with a scoop of coleslaw on top.
5. Vegetarian Chickpea Curry with Pre-Cooked Rice
Serves 4
Ingredients:
- 2 cans (15 oz each) chickpeas, drained and rinsed
- 1 can (14.5 oz) diced tomatoes
- 1 can (14 oz) coconut milk
- 1 onion, diced
- 2 cloves garlic, minced
- 1 tbsp grated ginger
- 2 tbsp curry powder
- 1 tsp turmeric
- 1/2 tsp cumin
- Salt to taste
- 2 cups pre-cooked rice
- Fresh cilantro for garnish
Instructions:
- At home, in a large pot, sauté onion, garlic, and ginger until softened.
- Add curry powder, turmeric, and cumin. Cook for 1 minute until fragrant.
- Add chickpeas, diced tomatoes, and coconut milk. Simmer for 20 minutes.
- Season with salt to taste. Allow to cool completely.
- Store curry and pre-cooked rice in separate airtight containers.
- At the campsite, reheat the curry in a pot over the campfire or on a camping stove.
- Warm the pre-cooked rice in a separate pot or in foil packets near the fire.
- Serve the curry over the warm rice and garnish with fresh cilantro.
Check out my article on the 10 Must-Have Camping Cookware for Outdoor Cooking. It's packed with essential gear recommendations to make your camping meals even more delicious and hassle-free!
Snacks and Sides
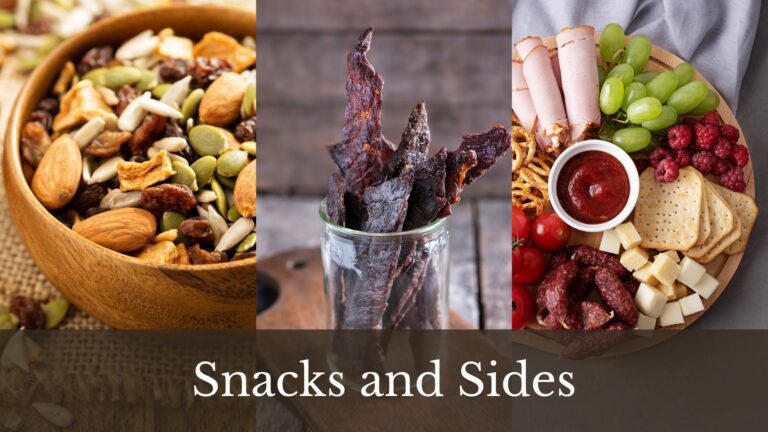
Keep your energy up between meals and round out your camping menu with these delicious and easy-to-pack snacks and sides!
1. Energy-Packed Trail Mix
Makes about 4 cups
Ingredients:
- 1 cup raw almonds
- 1 cup raw cashews
- 1/2 cup pumpkin seeds
- 1/2 cup sunflower seeds
- 1/2 cup dried cranberries
- 1/2 cup dark chocolate chips
- 1/4 cup dried blueberries
- 1/4 cup coconut flakes
Instructions:
- In a large bowl, combine all ingredients.
- Mix well to ensure even distribution.
- Store in airtight containers or resealable bags.
- Can be prepared up to 2 weeks in advance if stored in a cool, dry place.
Pro Tip: Customize your trail mix by swapping in your favorite nuts, seeds, and dried fruits. For a savory version, try adding pretzels and replace the chocolate with wasabi peas.
2. Homemade Beef Jerky
Makes about 1 pound
Ingredients:
- 2 lbs lean beef (top round or flank steak)
- 1/4 cup soy sauce
- 2 tbsp Worcestershire sauce
- 2 tbsp brown sugar
- 1 tsp smoked paprika
- 1 tsp garlic powder
- 1 tsp onion powder
- 1/2 tsp black pepper
Instructions:
- Slice beef against the grain into 1/4-inch thick strips.
- In a bowl, mix soy sauce, Worcestershire sauce, brown sugar, and spices.
- Add beef strips to the marinade, cover, and refrigerate for 4-24 hours.
- Preheat oven to 175°F (80°C) or prepare a food dehydrator.
- Remove beef from marinade and pat dry with paper towels.
- Arrange beef strips on oven racks or dehydrator trays, not touching.
- Dry in the oven for 4-6 hours or in a dehydrator for 6-8 hours, until beef is dry and leathery.
- Allow to cool completely before storing in airtight containers.
- Can be prepared up to 2 weeks in advance if stored in a cool, dry place.
Food Safety Tip: To ensure safety, it's recommended to heat the jerky to an internal temperature of 165°F (74°C) in an oven before the dehydrating process.
3. Roasted Vegetable and Hummus Platter
Serves 6 as a side
Ingredients:
- 2 cups store-bought or homemade hummus
- 1 red bell pepper, sliced
- 1 yellow bell pepper, sliced
- 1 zucchini, sliced
- 1 summer squash, sliced
- 1 red onion, cut into wedges
- 2 tbsp olive oil
- 1 tsp dried oregano
- Salt and pepper to taste
- 1 package pita bread or crackers
Instructions:
- Preheat oven to 425°F (220°C).
- Toss vegetables with olive oil, oregano, salt, and pepper.
- Spread on a baking sheet and roast for 20-25 minutes, until tender and lightly charred.
- Allow vegetables to cool completely.
- Pack hummus, roasted vegetables, and pita bread or crackers separately in airtight containers.
- At the campsite, arrange hummus in a bowl surrounded by roasted vegetables and pita bread or crackers.
Serving Suggestion: This platter can be enjoyed cold or at room temperature, making it perfect for a no-fuss camping snack or side dish.
4. Fruit and Nut Bars
Makes 12 bars
Ingredients:
- 2 cups mixed nuts (almonds, walnuts, pecans)
- 1 cup dried fruits (dates, apricots, raisins)
- 1/4 cup honey
- 1/4 cup almond butter
- 1 tsp vanilla extract
- 1/4 tsp salt
Instructions:
- Line an 8×8 inch baking pan with parchment paper.
- In a food processor, pulse nuts until roughly chopped.
- Add dried fruits and pulse until combined.
- In a small saucepan, heat honey and almond butter until smooth.
- Remove from heat and stir in vanilla and salt.
- Pour the honey mixture over the nut and fruit mixture and stir to combine.
- Press the mixture firmly into the prepared pan.
- Refrigerate for at least 1 hour until firm.
- Cut into 12 bars and wrap individually in parchment paper or plastic wrap.
- Store in an airtight container in a cool place for up to 2 weeks.
Variation: For a chocolate version, drizzle melted dark chocolate over the bars before refrigerating.
5. Cheese and Crackers with Dried Fruits
Serves 4-6 as a snack
Ingredients:
- 8 oz hard cheese (cheddar, gouda, or parmesan), cubed
- 8 oz soft cheese (brie or camembert)
- 1 package of sturdy crackers
- 1 cup mixed dried fruits (apricots, figs, dates)
- 1/4 cup nuts (optional)
Instructions:
- Cut hard cheese into small cubes.
- Leave soft cheese whole, wrapped in its original packaging.
- Pack cheese, crackers, dried fruits, and nuts (if using) in separate airtight containers or resealable bags.
- At the campsite, arrange cheese, crackers, and dried fruits on a platter or cutting board.
- Serve at room temperature for best flavor.
Pairing Tip: This makes a great happy hour snack. Consider pairing with a bottle of wine for a gourmet camping experience.
Storage Note: Hard cheeses can last several days unrefrigerated, but consume soft cheeses within 24 hours if not kept cold.
How to Store and Reheat Your Make Ahead Camping Meals
Properly storing and reheating camping meal preps are extremely important for enjoying safe, delicious meals on your camping trip. Follow these guidelines to keep your food fresh and tasty.
Best Coolers and Ice Packs for Food Preservation
- High-Performance Coolers:
- Look for rotomolded coolers from brands like Yeti, RTIC, or Pelican.
- These can keep ice frozen for 5-7 days in ideal conditions.
- Consider size based on trip length and group size.
- Budget-Friendly Options:
- Coleman or Igloo coolers offer good performance at a lower price point.
- Expect to keep ice frozen for 2-4 days.
- Ice Packs:
- Use a combination of block ice and ice packs for optimal cooling.
- Freeze water in large plastic containers for long-lasting block ice.
- Gel packs or dry ice can be used for foods requiring deeper freezing.
Vacuum Sealing vs. Zip-Top Bags
- Vacuum Sealing:
- Pros: Extends food freshness, prevents freezer burn, compact storage.
- Cons: Requires special equipment, bags can't be reused.
- Best for: Meats, pre-cooked meals, items for longer trips.
- Zip-Top Bags:
- Pros: Affordable, reusable, easily accessible.
- Cons: Less airtight than vacuum sealing.
- Best for: Short trips, dry goods, sandwiches, snacks.
Reheating Methods
- Campfire:
- Use a grill grate over the fire for pots and pans.
- Wrap food in foil and place near hot coals.
- Rotate food regularly for even heating.
- Portable Stove:
- Great for controlled cooking and reheating.
- Ideal for simmering soups, stews, and sauces.
- Use a non-stick pan for easy cleanup.
- Solar Oven:
- Eco-friendly option for sunny days.
- Slow but effective for reheating pre-cooked meals.
- Requires no fuel, but dependent on weather conditions.
Food Safety Temperature Guidelines
- Safe Minimum Internal Temperatures:
- Beef, pork, lamb, veal (steaks, roasts, chops): 145°F (63°C)
- Ground meats: 160°F (71°C)
- Poultry (whole or ground): 165°F (74°C)
- Fish and shellfish: 145°F (63°C)
- Danger Zone:
- Keep cold foods below 40°F (4°C).
- Keep hot foods above 140°F (60°C).
- Avoid leaving food in the “danger zone” (between 40°F and 140°F) for more than 2 hours.
- Using a Food Thermometer:
- Invest in a reliable, portable food thermometer.
- Check temperatures in the thickest part of the food, away from bone or fat.
Tips for Keeping Meals Fresh for Multi-Day Trips
- Meal Planning:
- Plan to eat more perishable items (fresh meats, dairy) in the first days of your trip.
- Save non-perishable and canned goods for later in the trip.
- Proper Packing:
- Use a separate cooler for drinks to minimize opening of the food cooler.
- Pack items in reverse order of use, with later meals at the bottom.
- Ice Management:
- Drain water from melted ice daily and replenish with fresh ice when possible.
- Keep coolers in the shade and covered with a light-colored blanket to reflect heat.
- Food Prep:
- Pre-cook and freeze meals when possible. They'll help keep other items cold and be safer to eat.
- Use shelf-stable alternatives when available (e.g., UHT milk instead of fresh).
- Hygiene:
- Bring biodegradable soap and warm water for washing hands and utensils.
- Use separate cutting boards and utensils for raw and cooked foods.