
There’s something truly magical about cooking over an open flame. Nothing beats the experience of gathering around a campfire to prepare a meal. But if you’re just starting out, the idea of campfire cooking can feel a bit daunting. In reality, it's not that difficult as long as you keep things simple and fun.
Cooking over a campfire is easier than you think… all it takes is a few simple recipes and the willingness to get your hands a little smoky.
We’ve put together a collection of easy campfire recipes perfect for beginners. These dishes are not only delicious but also require minimal ingredients and equipment, making them ideal for anyone who wants to enjoy great food in the great outdoors.
Table of Contents
Campfire Cooking Basics
Gear
- Sturdy Cast-iron Skillet
- Good Pair of Tongs
- Metal Spatula
- Heavy-duty Aluminum Foil
- Campfire Cooking Grate
- Heat Resistant Gloves
- Roasting Sticks
Safety
Safety first! Always start by setting up your campfire in a designated fire pit if available. Clear the area of dry leaves and branches to avoid any mishaps.
Keep a bucket of water or sand close by to douse the fire if things get out of hand. Never leave your fire unattended and make sure it's fully extinguished before you leave or go to sleep.
Wood
- Oak
- Hickory
- Maple
- Avoid softwoods like Pine
Food Prep
Pre-chop vegetables, marinate meats, and have all your ingredients ready to go. Prepping in advance allows you to focus on the joy of cooking over a campfire without the stress.
Breakfast of Champions
A hearty, warm breakfast can set the tone for an adventurous day ahead. Luckily, there are plenty of easy and delicious options you can whip up over the campfire.
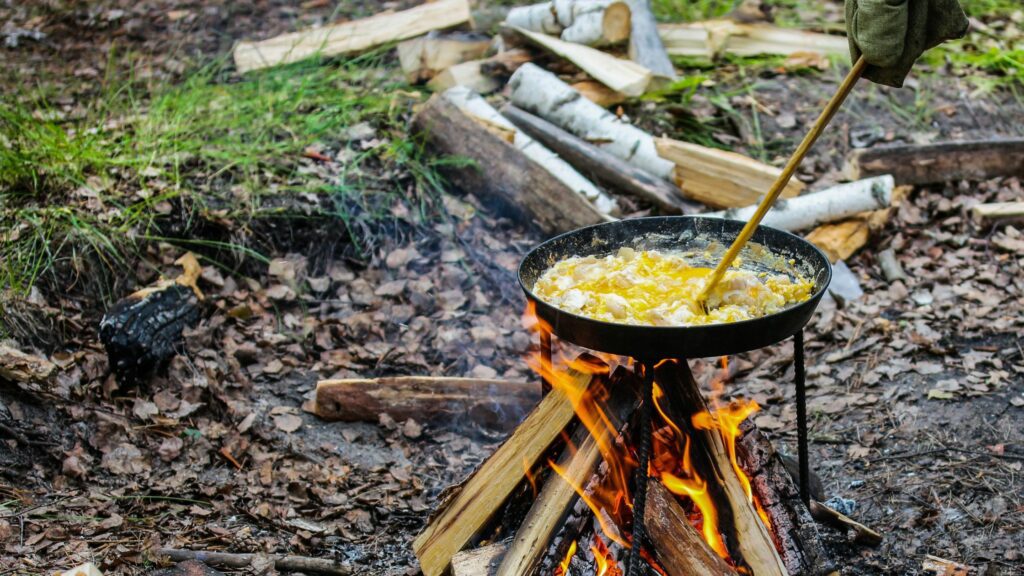
Campfire Skillet Scramble
- 6 large eggs
- 1/4 cup milk
- 1 cup diced potatoes
- 1/2 cup diced bell peppers (any color)
- 1/4 cup diced onions
- 1 cup diced ham or bacon (pre-cooked)
- 1 cup shredded cheddar cheese
- 2 tablespoons butter or oil
- Salt and pepper to taste
- Optional: Fresh herbs like chives or parsley
Prep ahead: At home, dice the potatoes, peppers, and onions. Store in a sealed container or zip-lock bag. Crack the eggs into a leak-proof container and add the milk – give it a good shake before use!
Directions:
- Light the campfire! You'll want a medium-hot bed of coals – not raging flames.
- Place your cast-iron skillet on the grill grate over the fire. Add butter or oil and let it heat up (about 1 minute).
- Toss in the potatoes first – they take the longest to cook. Stir occasionally and cook for about 5-7 minutes until they start to soften.
- Add the peppers and onions. Cook for another 3-4 minutes until they are tender.
- Throw in the pre-cooked ham or bacon and give everything a good stir.
- Pour in your egg mixture. Using a spatula or wooden spoon, gently stir and scrape the bottom of the skillet as the eggs cook. This should take about 2-3 minutes.
- When the eggs are almost set but still a bit runny, sprinkle the cheese on top.
- Remove from heat and let it sit for a minute.
- Garnish with herbs if you're feeling fancy, and dig in while it's hot!
Campfire Lunch
Foil packet meals are perfect for a quick lunch between hikes or just relaxing at the campsite. It's simple, requires minimal cleanup, and results in mouthwatering meals. The idea is to wrap your ingredients in a foil pouch, which then steams and cooks the food to perfection over the campfire
Foil Packet Fajitas
Ingredients (per packet):
- 1/2 lb sliced chicken, beef, or shrimp (or mixed vegetables for a veggie version)
- 1 bell pepper, sliced
- 1 onion, sliced
- 1 tablespoon olive oil
- 2 tablespoons fajita seasoning
- Salt and pepper to taste
- Optional: sliced jalapeños for heat lovers
For serving:
- Tortillas
- Shredded cheese
- Sour cream
- Salsa or hot sauce

Assembly instructions:
- Tear off a piece of heavy-duty aluminum foil, about 18 inches long.
- In the center of the foil, place your protein of choice (or veggies).
- Top with sliced bell peppers and onions.
- Drizzle with olive oil and sprinkle fajita seasoning, salt, and pepper over everything.
- To create the packet, bring the long sides of the foil together over the ingredients. Fold the edges over a few times to seal, leaving some space above the food for steam.
- Fold up the shorter ends of the foil to complete the packet.
Directions:
- Place your foil packets on a grill grate over your campfire. Aim for medium-high heat – you should be able to hold your hand about 6 inches above the grate for 3-4 seconds.
- Cook for about 10-15 minutes, flipping the packets halfway through.
- Carefully open one packet to check doneness. The veggies should be tender, and the protein should be cooked through.
- If needed, reseal and cook for an additional 2-3 minutes.
- Once done, remove from heat and let the packets rest for a few minutes.
- Open the packets carefully and slide the contents onto tortillas.
- Top with cheese, sour cream, salsa, or any other fajita fixings you love.
Hearty Dinner
Dinners around the campfire bring everyone together, and they’re the perfect opportunity to showcase some truly tasty dishes without the hassle. As a beginner, you can create satisfying meals with just a few simple ingredients and techniques.
One-Pot Campfire Chili
Ingredients (serves 4-6):
- 1 lb ground beef (or turkey)
- 1 large onion, diced
- 2 cloves garlic, minced
- 1 bell pepper, diced
- 1 can (14.5 oz) diced tomatoes
- 1 can (15 oz) kidney beans, drained and rinsed
- 1 can (15 oz) black beans, drained and rinsed
- 1 can (8 oz) tomato sauce
- 2 cups beef broth (or vegetable broth)
- 2 tablespoons chili powder
- 1 teaspoon cumin
- 1 teaspoon oregano
- Salt and pepper to taste
- 2 tablespoons oil

Prep Ahead:
At home, pre-measure your spices and store them in a small zip-lock bag. Dice the onion and bell pepper, and store them in a container. Brown the meat at home and store it in a cooler – this will save you time at the campsite!
Directions:
- Place your Dutch oven or large pot on the grill grate over your campfire. You want medium-high heat.
- Add oil to the pot and let it heat up for a minute.
- Toss in the onions and bell peppers. Cook for about 5 minutes, stirring occasionally, until they start to soften.
- Add the garlic and cook for another minute.
- If you didn't brown the meat at home, add it now. Break it up with a wooden spoon and cook until it's no longer pink, about 5-7 minutes.
- Sprinkle in your chili powder, cumin, and oregano. Stir well to coat everything.
- Pour in the diced tomatoes, tomato sauce, and broth. Give it a good stir.
- Add your beans and stir again.
- Bring the chili to a simmer, then move your Dutch oven to a cooler part of the fire or raise it slightly above the grate to maintain a gentle simmer.
- Let it cook for about 30-40 minutes, stirring occasionally. If it gets too thick, add a bit more broth or water.
- Taste and adjust seasonings as needed. Remember, flavors intensify as the chili cooks, so go easy on the salt at first!
- Once it's reached your desired thickness and the flavors have melded, it's time to enjoy!
Classic Campfire Treat
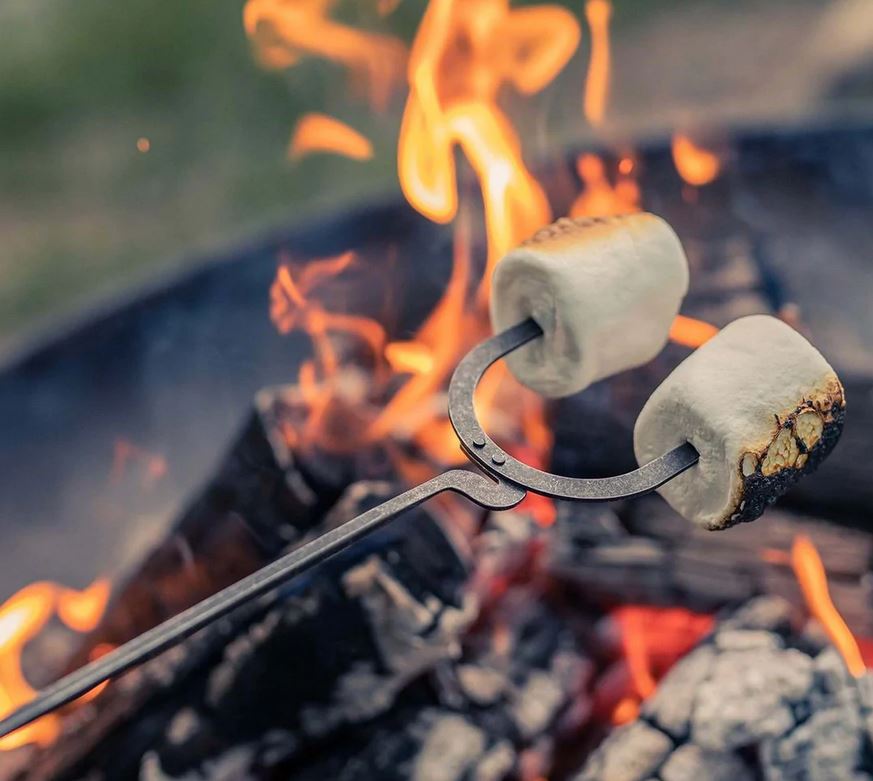
S'mores with a Twist
The grand finale of any respectable camping trip is s'mores! But we're not just talking about your run-of-the-mill s'mores here. We're going to elevate this classic treat to new heights.
Ingredients:
- Graham crackers
- Marshmallows
- Milk chocolate bars
Assembly:
- Break a graham cracker in half to create a sandwich.
- Place a piece of chocolate on one half.
- Roast a marshmallow (more on that later!).
- Place the gooey marshmallow on top of the chocolate.
- Use the other graham cracker half to squish it all together.
- Enjoy the melty, messy goodness!
Creative variations to elevate the classic recipe:
- The Nutella Dream: Swap out the chocolate bar for a smear of Nutella. Trust me, it's life-changing.
- The Peanut Butter Cup: Use a peanut butter cup instead of plain chocolate. Reese's fans, rejoice!
- The Banana Boat: Slice a banana lengthwise, stuff it with chocolate and marshmallows, wrap in foil, and heat over the fire. Serve with graham crackers for dipping.
- The Strawberry Shortcake: Use shortbread cookies instead of graham crackers, and add a slice of fresh strawberry.
- The Salted Caramel Delight: Drizzle some store-bought caramel sauce on your chocolate and sprinkle with sea salt.
- The Cookies ‘n' Cream: Use chocolate graham crackers and stuff with a cookies ‘n' cream chocolate bar.
- The Lemon Meringue Pie: Spread lemon curd on the graham cracker before adding the roasted marshmallow.
- The Spicy Mexican: Add a pinch of cinnamon and cayenne to your chocolate for a spicy kick.
- The Elvis: Spread peanut butter on the graham cracker, add banana slices, then the chocolate and marshmallow.
- The Coconut Dream: Roll your roasted marshmallow in shredded coconut before assembling.
Campfire Dessert
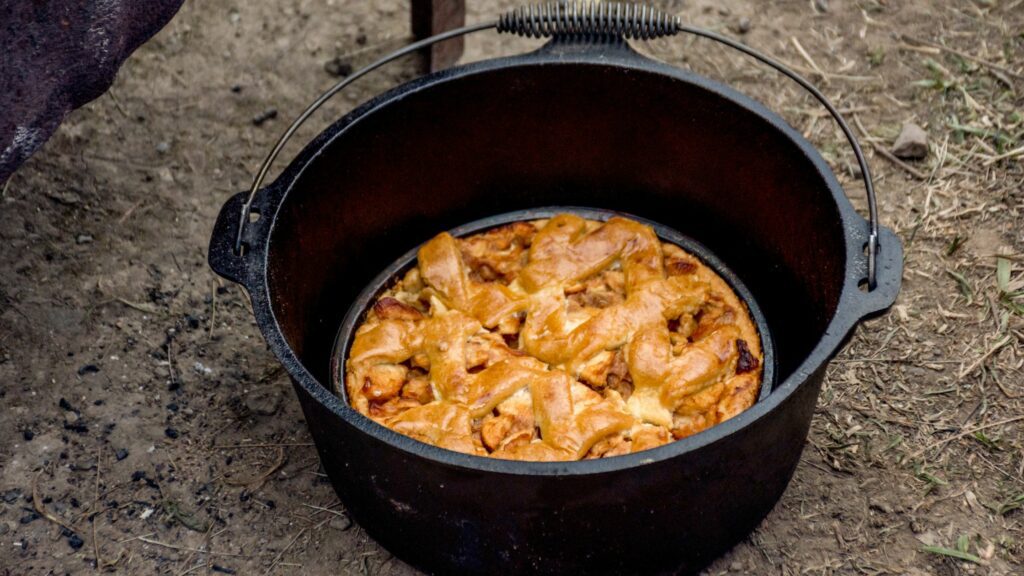
Dutch Oven Apple Cobbler
This dessert is so good, you might forget you're in the great outdoors and think you've wandered into a five-star restaurant! Learn more about the best Dutch ovens for camping here.
Ingredients:
- 5-6 large apples, peeled and sliced
- 1 cup sugar
- 1 tablespoon cinnamon
- 1/2 teaspoon nutmeg
- 1 box yellow cake mix
- 1/2 cup (1 stick) butter, cut into small cubes
- 1/2 cup chopped nuts (optional)
Preparation steps:
- Grease the inside of your Dutch oven with butter or oil spray.
- In a large zip-lock bag, combine sliced apples, 1/2 cup sugar, cinnamon, and nutmeg. Shake well to coat apples.
- Pour the coated apples into the Dutch oven, spreading them evenly.
- Sprinkle the dry cake mix evenly over the apples.
- Dot the top with butter cubes. The more evenly you distribute them, the better your cobbler will turn out.
- If using, sprinkle chopped nuts over the top.
- Place the lid on your Dutch oven.
Directions:
- Prepare your campfire. You'll want a bed of hot coals, not flames.
- Place the Dutch oven on a bed of hot coals. Put about 10-12 hot coals on top of the lid.
- Cook for approximately 45 minutes to 1 hour. Remember to rotate the pot and lid every 15 minutes for even cooking.
- Check doneness by carefully lifting the lid (use heat-resistant gloves!). The cobbler is done when the top is golden brown and the apple mixture is bubbling around the edges.
- Once done, remove from heat and let it cool for about 15 minutes before serving.