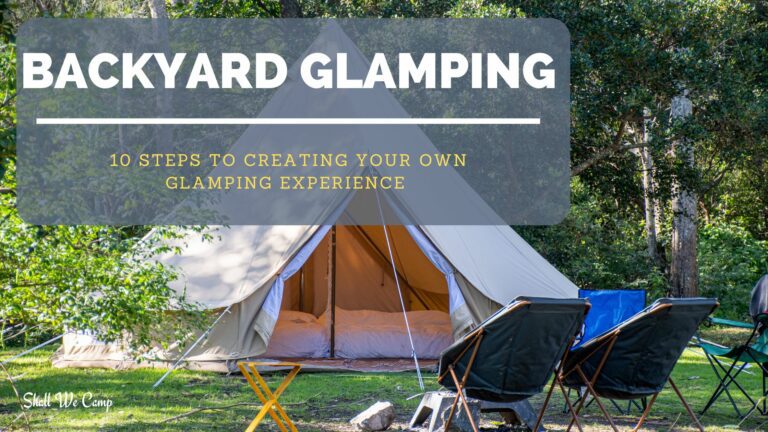
Who says you need to trek into the wilderness to enjoy the great outdoors? Backyard glamping is the latest trend sweeping the nation, with a whopping 62% of Americans preferring to camp closer to home.
But how do you turn your own slice of paradise into a luxury camping haven?
From cozy tents to twinkling lights, we'll show you how to create a backyard glamping experience that'll make your neighbors green with envy.
Table of Contents
What is Backyard Glamping?
We've always loved the idea of camping, but sometimes between work, kids' activities, and the hassle of packing up for a weekend in the woods, it just wasn't happening as often as we'd like. The concept of backyard glamping changed our lives!
Basically this trend takes the idea of “glamorous camping” and brings it right to your own backyard. Imagine all the fun of camping – the fresh air, the starry nights, the s'mores – but with the comforts of home just a few steps away.
You can set up a fancy tent in the backyard, complete with air mattresses, cozy blankets, and aesthetic lights. Plus you'll be able to use your own bathroom, since you're just a stone's throw from your back door.
There are obviously benefits of creating a glamping experience at home.
It's way more budget-friendly than traditional camping trips. No need to pay for campsite fees, gas for long drives, or expensive gear you'll only use once in a blue moon. Plus, you can reuse your backyard setup whenever the mood strikes!
It's extremely convenient. Forgot to pack something? No problem! Just pop inside and grab it. Got a sudden work emergency? You're right there to handle it. And for parents of young kids, it's a great way to introduce them to camping without the stress of being far from home.
It's comfortable. While I love roughing it in the great outdoors sometimes, there's something to be said for having a real bed, protection from the elements, and easy access to a fully stocked kitchen.
That being said, backyard glamping isn't just “easier” camping. It's a whole different experience. You're not just sleeping outside; you're creating a luxurious outdoor retreat. Think plush pillows, gourmet s'mores, and maybe even an outdoor movie screen. It's about bringing the best parts of indoor living outside.
If you want to learn more about glamping and how it differs from traditional camping, check out our article What is Glamping? It will give you the full scoop on this luxurious outdoor trend and might just inspire your next backyard adventure!
Step 1: Choosing Your Glamping Tent
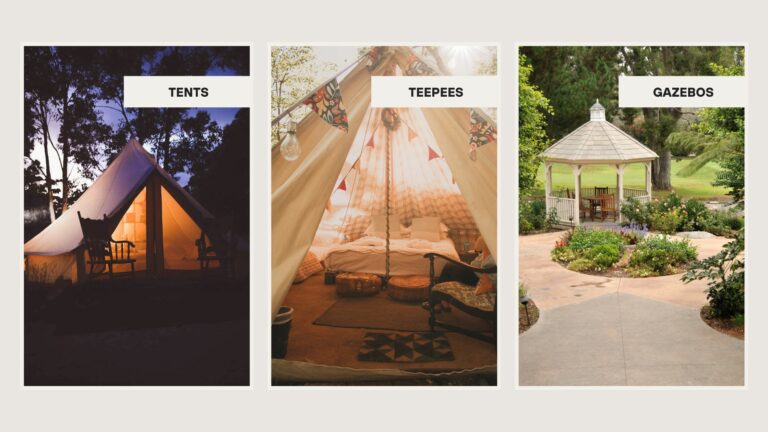
Types of Glamping Tents:
Bell Tents – These are spacious, with high ceilings that make you forget you're in a tent at all. Plus, they look absolutely gorgeous in photos.
Teepees – These are usually a hit with kids because of their whimsical, storybook feel.
Yurts – Another fantastic option, however they tend to be a bit more permanent. Once set up, it can become like a second living room. Cozy in the winter and cool in the summer.
Treehouses – These can be amazing if you've got the right setup. Obviously a suitable tree is required.
Renovated Campers – This is a cool option where you can transform old RV's into charming little glamping nooks. It's like having a tiny house in your backyard!
Gazebos – Turn an existing gazebo setup into a magical little oasis by adding sheer curtains and twinkle lights.
Factors to Consider:
Think about space – How many people are you accommodating? Nothing ruins the glamping vibe faster than being packed in like sardines.
Weather – If you live somewhere rainy like we do, you'll want something waterproof.
Setup Time – Some of these options can be quite involved to set up. You don't want to spend so long wrestling with a complicated tent that you are too tired to enjoy the glamping experience!
How often you'll use it – If you're planning to glamp regularly, it might be worth investing in something more durable and permanent. But if it's just for occasional use, a simpler option might do the trick.
Choosing your glamping accommodation is all about balancing your dreams with practicality. Don't be afraid to start small and work your way up.
Step 2: Create a Cozy Sleeping Area
The sleeping area in a glamping setup is probably the most important part. After all, a good night's sleep can make or break your glamping experience. So don't just throw a sleeping bag on the ground and think that will cut it.
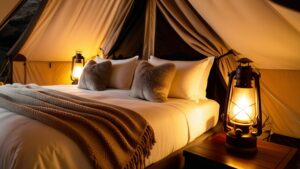
Comfortable Bedding Options:
Air Mattresses –
Air mattresses are popular, and for good reason. They're easy to inflate and deflate, and they store away nicely. But be sure to invest in a good quality one that won't deflate and leave you on the ground by morning.
Cots –
Cots are another solid choice. They keep you off the ground, which is great for air circulation and staying warm. Plus, if you've got a bad back, they can be a real lifesaver.
Foam Mattresses –
Splurge on a memory foam mattress topper, and you'll feel like your sleeping on a cloud. Let me tell you, it is worth every penny.
Luxury Linens and Pillows:
A mattress alone does not a cozy bed make! That's where luxurious linens come in. Don't make the mistake of using old, scratchy sheets just because you're “camping”. Treat yourself to some soft, high-thread-count sheets.
And when it comes to pillows, be sure to bring ALL the pillows. Seriously, this is not the time to skimp. I like to create a veritable nest of pillows – some for sleeping, some for propping up to read, and some just because they look pretty. Make it your glamping oasis!
Add-Ons for Comfort and Style:
Little add-ons can take your sleeping area from “nice” to “wow!”. A plush rug beside the bed adds a luxurious feel that helps bring the inside to your backyard. It's so much nicer than stepping onto cold ground first thing in the morning.
Side tables are another must-have in my book. Where else are you going to put your book, your water, your phone? We always make sure to include a small table or two as well as a rechargeable decorative lamp. It makes the space feel more like a real bedroom.
Don't forget about storage solutions, either. Nothing kills the glamping vibe faster than a bunch of clutter. We use fabric-lined baskets to keep things organized – one for clothes, one for shoes, one for miscellaneous items. It keeps everything tidy and adds to the decor.
Make sure to bring a small fan. Even if it's not hot out, the air circulation makes a big difference in comfort. We like to use the VENTY portable camping fan because it has adjustable height and oscillating features.
Remember, the goal here is to create a space that's so cozy, you almost forget you're in your backyard. It should feel like a little retreat from the world. So go ahead, indulge in that extra fluffy comforter or those silk pillowcases.
Creating a cozy sleeping area is all about layering comforts. Start with a good base (your mattress), add some luxury (those linens!), and then top it off with personal touches that make you smile. Before you know it, you'll have a sleeping space that rivals any fancy hotel room – right in your own backyard!
Step 3: Set the Mood with Lighting

Setting the mood with the right lighting can turn your backyard into a magical oasis and create a rich ambiance.
* Drape some string lights across your glamping area for a soft glow in the evenings.
* Lanterns are perfect for creating little pockets of light around your space.
* Use some solar stake lights to line your pathways. They can charge during the day and automatically light up at night.
* Create a cozy ambiance with candles and fire pits. There's just something about flickering flames that instantly ups the cozy factor.
* Use battery-operated tea lights in paper bags to create luminaries. They look stunning lined up along paths or clustered in corners. Plus, they're safe to use inside the tent for a soft, warm glow.
Lighting isn't just about being able to see – it's about creating an atmosphere. Play around with different combinations until you find what works for you. Maybe you want a bright, festive vibe, or perhaps you're going for more of a serene, spa-like feel.
And don't forget to enjoy the natural lighting, too! There's nothing quite like watching the sunset from your glamping site, or gazing at the stars once night falls. Sometimes, the best lighting is the one Mother Nature provides.
Step 4: Design an Outdoor Living Space
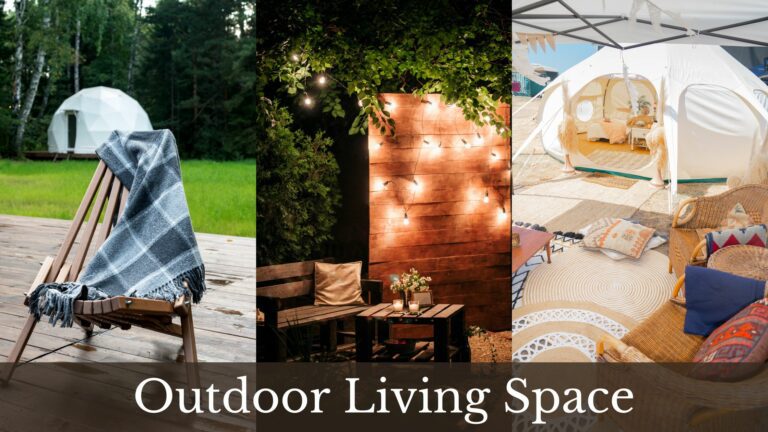
The heart and soul of your backyard glamping experience is the outdoor living space! This is where you'll be spending most of your waking hours, so it's gotta be good.
________________________________________________
First things first: Seating. You want options, and plenty of 'em. Mix traditional folding chairs with bean bag chairs, hammocks, loveseats and ottomans.
Outdoor rugs help define your space and make it feel more like an outdoor room. We've got a big one under our main seating area, and it really ties everything together. Just make sure you get one that's actually meant for outdoor use.
Don't be afraid to bring some indoor elements outside. For instance an old dresser can be repurposed as an outdoor buffet. It's great for storing games and snacks, plus it adds a homey touch to the space.
Creating defined areas for relaxation and activities is key to a well-designed outdoor living space. We've got our main lounging area, a separate dining space, and a little nook we call the “Zen den” for reading or afternoon naps.
________________________________________________
Remember, your outdoor living space should be an extension of your indoor style. If you love bright colors inside, bring that vibrancy outside! If you're more into a minimalist vibe, keep it simple and sleek. The goal is to create a space that feels like you.
Designing your outdoor living space is all about creating comfort and functionality with a dash of style. It might take some tweaking to get it just right, but that's part of the fun!
Step 5: Elevate Your Outdoor Dining Experience
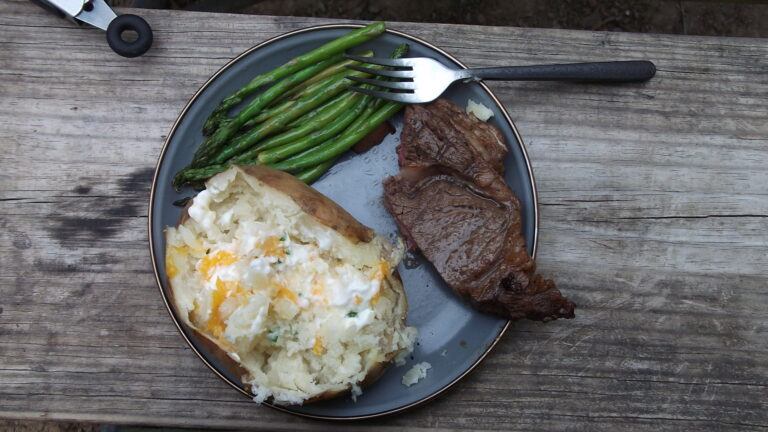
One of my personal favorite parts of glamping is the food! Elevating your outdoor dining experience can turn a simple camping trip into a gourmet getaway.
Now, I'm no Gordon Ramsay, but I've learned that having the right tools can make you feel like a master chef, even in your backyard. We started with a basic portable grill, and while it got the job done, it wasn't exactly glamping material. These days, we're rocking a fancy propane grill that makes me feel like I'm hosting my own cooking show every time I fire it up!
Camp stoves are another great option, especially for breakfast or quick meals. We've got a nifty two-burner stove that's perfect for whipping up Brioche French Toast in the morning or heating up some soup on a chilly evening.
Of course there is always the good old campfire! There's something magical about cooking over an open flame. We love using our cast iron skillet for everything from juicy steak to fancy s'mores dip.
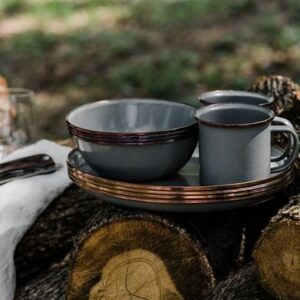
Now, let's talk about dinnerware. This is where you can really amp up the ‘glam' in glamping. Ditch those paper plates and plastic forks. We invested in some stylish plates and bowls from Barebones Living that are practically indestructible.
And opt for actual flatware. Find a style that compliments your dinnerware. We've got these rustic hammered metal sets that go perfectly with our aesthetic.
A folding table with an elegant tablecloth can instantly transform your outdoor space into a chic dining area. Add some cloth napkins and a set of unbreakable wine glasses and you'll feel like you are dining at a five-star restaurant under the stars!
Always have a backup plan for bad weather. We've got a pop-up canopy that we can quickly set up over our dining area if rain threatens. Because let's face it, there's nothing glamorous about eating soggy sandwiches in a downpour!
The key to a great outdoor dining experience is to make it feel special. Use real dishes, light some candles, play some soft music. Heck, you could even dress up a little if you feel like it!
Step 6: Incorporate Nature and Greenery
Use potted plants and flowers to jazz up your space. When I first started glamping, I thought, “Hey, we're already outside. Why do we need more plants?” But honestly, adding some potted plants really takes things to the next level. You can use a mix of ferns, colorful annuals, and even a small citrus tree to make it feel like a tropical paradise.
Go for a variety of heights and textures. Tall grasses in big pots for privacy, hanging baskets for a touch of whimsy, and some low-growing succulents scattered around.
Another great glamping addition is a mini herb garden. If you haven't tried cooking with fresh herbs you've just picked, you're missing out! We've got a cute little herb box with basil, rosemary, thyme, and cilantro.
Integrate natural elements like pieces of driftwood for decor or even an impromptu side table. Stones and large rocks are another great way to add natural texture. We've used them to create pathways between different areas of our glamping site. It not only looks great but also helps keep the mud at bay when it rains.
Incorporating water features can add a serene, outdoorsy vibe. Splurge on a small, solar powered water fountain or fill a galvanized tub with water and lily pads.
Let your inner nature lover run wild. Before you know it, you'll have created a backyard paradise that's part campground, part botanical garden, and all awesome!
Step 7: Plan Fun Glamping Activities
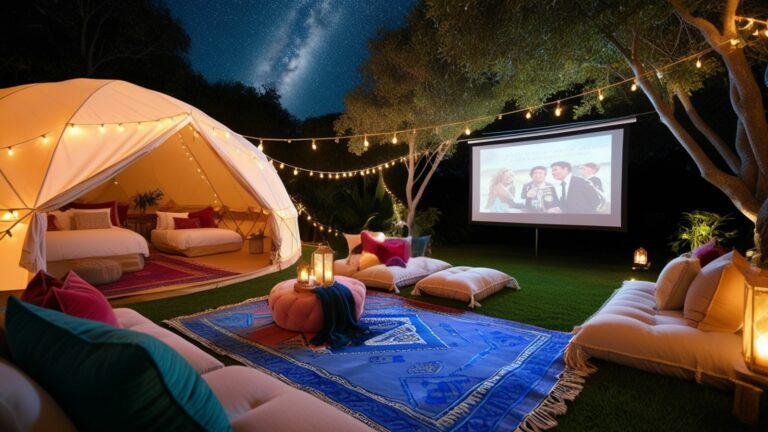
As cozy as that luxury tent might be, you can't spend your whole glamping trip just lounging around. Well, I mean, you could, but where's the fun in that?
Let's kick things off with one of my all-time favorites: outdoor movie nights. Hang a white sheet between two trees or an outdoor wall, set up a projector, and voila! Instant outdoor cinema.
Next up: stargazing. We invested in a decent telescope, and let me tell you, it's been worth every penny. But if a telescope isn't in your budget, don't worry, you can always use just a star chart and our own eyes. It's amazing how much you can see once you learn what to look for.
Now, no glamping trip is complete without some good old-fashioned campfire storytelling. There's something about the flicker of firelight that brings out the storyteller in everyone. We take turns spinning yarns – everything from spooky ghost stories to hilarious family anecdotes.
And don't forget about the pinnacle of campfire activities: making s'mores. We like to elevate our s'mores with different types of chocolate and even adding sliced strawberries or banana. And I've become partial to using shortbread cookies instead of traditional graham crackers.
Once again, always have a backup plan for rainy days. A deck of cards, a few board games, or maybe a good book can be lifesavers when Mother Nature decides to crash your glamping party!
Step 8: Add Luxurious Touches
Now it's time to add those luxurious touches that'll make your backyard feel like a five-star resort! This is where we separate the campers from the glampers, folks. Once you've experienced these little indulgences, you'll never want to go back to regular old camping again.
Plush bathrobes and slippers – There's something incredibly decadent about wrapping yourself in a fluffy robe after a day of outdoor activities. We keep ours hanging on cute little hooks outside the tent, ready for that post-shower or post-swim moment.
Aromatherapy diffusers – These babies can transform your glamping space into a relaxing spa-like retreat. We love using nature-inspired scents like pine, lavender, or cedarwood. It's like bringing the essence of the forest right into your tent!
Gourmet snacks and beverages – Forget trail mix and lukewarm water; instead opt for artisanal cheeses, fancy crackers, and maybe even a bottle of bubbly! We set up a cute little bar cart stocked with an assortment of treats…. ingredients for cocktails, herbal teas, a cheese board and knife, and a French press for morning coffee.
Step 9: Ensure Comfort and Convenience
The key to comfort and convenience in glamping is anticipating your needs. Think about what would make you comfortable at home and try to recreate that in your outdoor space.
Temperature control – Set up a portable fan to stay cool in the summer and a propane heater to keep warm in the winter.
Pest Control – Use bug repellent, citronella candles, and drape mosquito netting around your living space.
Bathroom Facilities – Create an area for a pop-up privacy tent equipped with a camping toilet and a solar shower bag.
It's all about finding that sweet spot between roughing it and living in luxury. So set up that fan, light those citronella candles, and enjoy your private bathroom facilities. Because at the end of the day, glamping should be about enjoying nature, not enduring it!
Step 10: Capture the Memories
If you don't document your epic backyard adventure, did it even happen?
Taking pictures is a great way to capture all the glamping memories. To make sure your photos are instagram-worthy, try to shoot during “golden hour” just before sunset. This will give your pics a dreamy, glowy quality.
Get creative with your angles. To capture your cozy tent setup, try shooting from inside looking out for a unique perspective. Your amazing outdoor dining spread? An overhead shot from standing on a chair can make it look like it's straight out of a magazine.
Don't be afraid to stage things a little. I'm not saying you should fake your entire glamping experience, but there's no harm in arranging your lights just so, or making sure your mug of hot cocoa is placed artfully next to that book you're “casually” reading. It's all about creating that perfect vibe!
I like to capture the little details too. The pattern on your bohemian rug, the steam rising from your morning coffee, the way the sunlight filters through the trees – these are the things that really bring your glamping story to life.
Besides just taking pictures of your elegant setup, you can create more memories by keeping a glamping journal. Take a nice leather-bound journal book and write down your experience or any memories you want to look back on someday. Be sure to date each entry and if you have guests camping with you, let them make some entries as well.
Happy Glamping
With these 10 steps, transforming your outdoor space into a luxurious retreat that rivals any high-end campsite should be a piece of cake. Remember, the goal of backyard glamping is to blend the comforts of home with the magic of the great outdoors.
So go ahead, pitch that tent, string up those lights, and get ready for nights filled with laughter, storytelling, and the simple joys of nature – all just steps away from your back door.
Happy glamping, and don't forget to share your amazing backyard transformation with us!
